Adding devices to a Site
Devices can be added to a Site using the built in web interface or via Pharos Designer.
Adding devices to a Site
Adding a device via Cloud and the controllers built in web interface
Pre-Requisites:
-
All controllers must be running firmware version 2.7.9 or above but we strongly recommend using the latest version.
-
All controllers will need access to the Internet. The networking guide can be downloaded from the website, here.
Provisioning Steps:
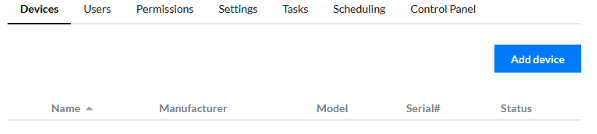
- In the Site device overview tab, click the 'Add device' button on the right-hand side of the screen.
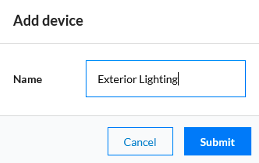
- Enter a name for your device in the 'Add device' modal. This name does not have to match the Controller’s name set in Pharos Designer but it may make sense to do so.
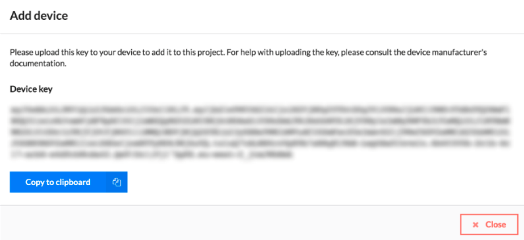
- A modal will appear with a Device Key which you must copy. Keys are valid for 7 days from creation. Older keys will be rejected by Pharos Cloud and will not allow a device to connect. To generate a new key for a device follow the replace a device procedure.
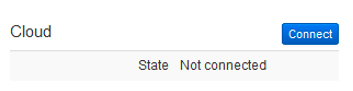
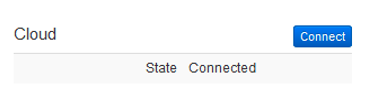
- Open your Controller’s local web interface and click 'Connect' under the Cloud heading on the Home page.
- Copy the key into the text box and click 'Set Device Key'.
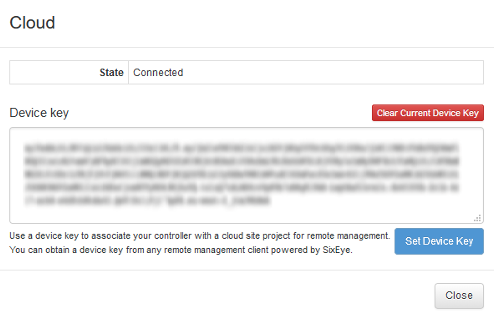
- You should see the status message change to 'Connecting' and then 'Connected' if successful. It may take a few minutes for the controller to provision.
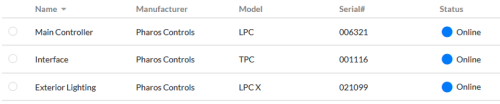
- If your Controller has successfully been added to your Site when you can see that your Controller shows as 'Online' in Cloud.
Adding a device via Pharos Designer
Pre-Requisites:
-
All controllers must be running firmware version 2.7.9 or above but we strongly recommend using the latest version.
-
All controllers will need access to the Internet. The networking guide can be downloaded from the website, here.
Provisioning Steps:
- The Cloud feature must first be enabled in Project Features.

-
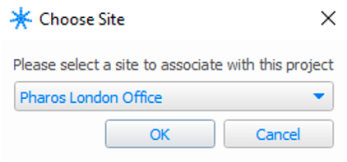
Near the top of the Project Properties tab, click the Cloud Site option to 'Choose site…'

-
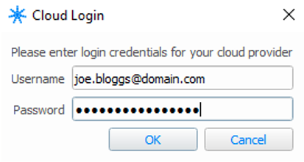
Enter your Cloud login credentials in the dialog and choose your Site from the drop-down list.
-
In Network view, you’ll see Controllers’ Cloud status in the 'Status' column. Controllers that are already associated and active within your Cloud Site will show a solid blue Cloud icon. Controllers that have previously been associated with a Cloud Site but are not currently active will show a hollow icon. If Controllers exist in your Site but you are not logged in inPharos Designer, the Cloud status icon will be greyed out.

If you need to log back in to Cloud, click the hollow cloud icon next to the issues icon. The solid icon shows that you are logged in.


-
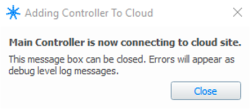
Click 'Add Controller to Cloud' which is found at the bottom of the Controller Properties tab in Network view. You should see the connection status dialog.
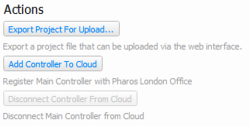
If the button is disabled, the Controller may have incorrect network setting; this will be displayed in the issues dialog. The Controller may already exist in the Cloud Site in which case you can either upload to it or use the 'Disconnect Controller from Cloud' button if the controller is connected to a different Cloud Site.
- If your Controller has successfully been added to your Site, the “Add Controller To Cloud” button will become disabled and you should now see that your Controller shows online in Cloud.
Controller Status in Cloud
There are five statuses that a Controller in the Cloud Site can have:
-
Online - The controller is actively communicating with the Pharos Cloud service
-
Offline - The controller is not actively communicating with the Pharos Cloud service
-
Unassociated - The controller has not yet connect to the Site or has been moved to a different Pharos CloudSite
-
Online - upgrade required - Controller is connected to Cloud but the firmware is less than 2.7.9.
-
Upgrade required - The controller is offline and the last cached firmware version is less than 2.7.9
If you see either of the last two, you may need to upgrade that controller locally. Contact us at cloud@pharoscontrols.com if you have any queries about this.
Replacing a device
-
Select a device by clicking the circle to the left of the device name in the device table
-
Select ‘Replace’ from the toolbar above the device table
-
Copy the device key to the new device and paste it into the device using the same method as when adding a device
The Device name will be retained but when the new device connects all existing device information will be lost and replaced by the new device information
Where possible, all settings related to this device will be retained but if the device type has changed, Tasks and Actions associated with this device may be invalid. Please check the Tasks tab for any conflicts.
Removing a device
-
Select an offline device by clicking the circle to the left of the device name
-
Select ‘Remove’ from the toolbar above the devices table
-
The device will be removed from the Site and the device will no longer try to connect to the Site