Upload
Once you have confirmed that your programming is as you want you can upload to the Controllers, remote devices and third party devices by either pressing the Upload button on the Network window or via File > Upload (Ctrl + U):

Direct upload (as opposed to remote, see the web interface), is not possible without connected Controllers (see the network section) but this allows you to upload your programming to one or more Controllers for stand alone operation.
You can either use the "Upload All" button to upload to all connected Controllers or select specific Controllers from list and press "Upload" to target them alone.
IMPORTANT: Changes made to the DALI configuration (including DALI groups and scenes) must be uploaded separately to the DALI ballasts, see DALI.
Issues
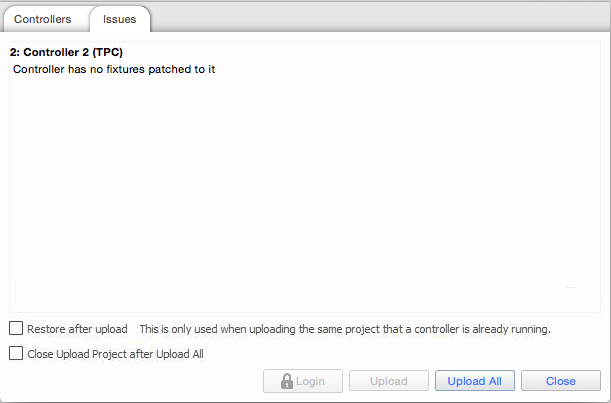
When you open the Upload dialog, there is a tab which lists potential errors with your project. Designer will check things like triggers and hardware configuration to make sure that there are no inconsistencies. If any issues are found, the Issues tab will be opened automatically and a description of each issue will be listed so that you can take corrective action, see Issues. You can proceed with the Upload ignoring the errors should you wish.
Restore After Upload
Check the "Restore after upload" box if you want the Controllers to continue playback of active timelines and scenes from where they left off, useful for soft openings when programming is still being tweaked while the installation is open to the public. The content of text slots will also persist when this option is chosen. This is not the same as a startup event and will only restore active playbacks. Note however that changes to the fixture schedule or patch will force the Controllers to reset playback and so cause a momentary black out.
Close Upload Project After Upload All
Check the "Close Upload Project after Upload All" box to close the Upload dialog once the upload process has completed successfully. This option will persist across all future uploads.
Overrides
If overrides have been made to the project on the controller since it was last uploaded (for example, RDM device replacements made using the controller web interface), a "+" symbol and the message "Overrides have not been downloaded" is displayed in the Status column. To bring the overrides into the project, right-click the affected controller and choose "Download Overrides".
Remove Overrides
Check the "Remove Overrides" box if you want to discard project overrides that are saved on the controller and upload only the contents of the project file.
Transfer to controllers after Upload to Remote Site
Check this checkbox to automatically transfer the uploaded project onto the controller when uploading to a controller connected to the SixEye Remote Management service via the Upload to Remote Site button.
Upload Options
The three upload buttons all serve slightly different purposes. Upload All will upload the project to all the local controllers in a project (which is usually what you want to do), Upload will only upload to the selected local controller (useful in cases where you are only making tweaks to a single controller but don’t want the other controllers to reset), and Upload to Remote Site will upload to all controllers that are currently connected to the Remote Site linked to the loaded Designer Project.
Login
If your controller has a password set for it, you will need to log in to the controller before you can upload to it using the Login button.
Saving Compiled project
The Save button can be used to Save the compiled project file rather than uploading it to the controller.
This compiled project can be used to upload over the controller's web interface, or by putting the file on the controller's memory.
The TPS hosts a cut down web interface that can be used to upload a compiled project file remotely.
What's Actually Uploaded?
A compressed version of the standard project file is uploaded to the controller. Typically (space allowing) all media and background images will be uploaded, along with all trigger, timeline and scene information. All controllers get all the data in the project (allowing the project to be downloaded from any controller).
Can the Project File be Retrieved from the Controller(s)?
The project file can be downloaded from the Network tab or the Controller's web interface.
Press the download button on the Network tab toolbar or the download project button on the Controller's Web Interface.