Working with Fixtures
At the heart of lighting control, laying out your fixtures on a plan is crucial. Whether your plan is accurate to the last millimetre, or fairly basic and abstract, the fixtures will have a relationship and spacing to each other in the software that should mirror their placement in the physical installation. Programming effects and simulating playback will then give you a good visual feedback of how the lighting will look.
Fixture Library
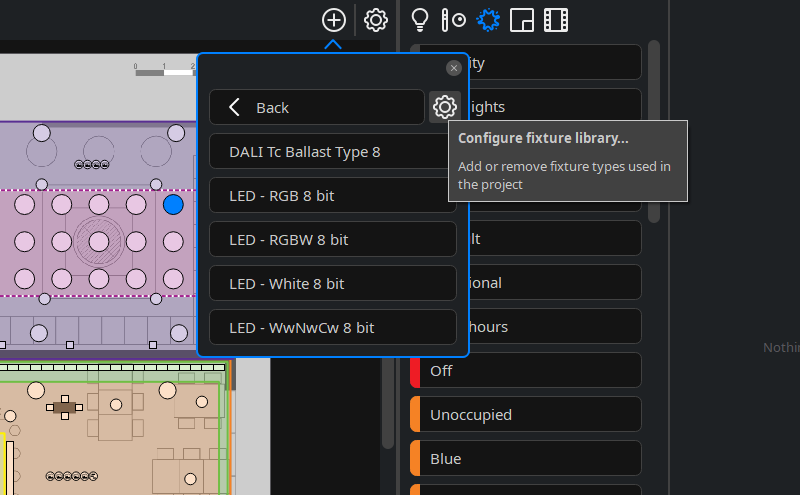
To configure your project's fixture library, click Configure Fixture Library![]() within the Add items to the project
within the Add items to the project![]() tool in the Canvas window.
tool in the Canvas window.
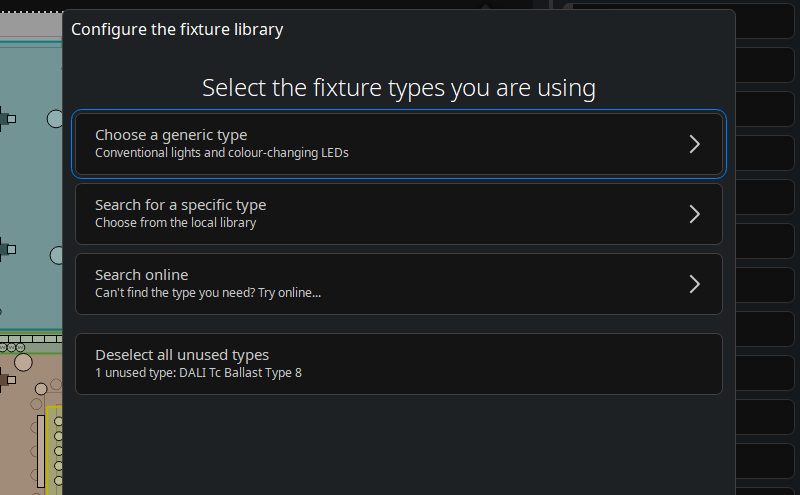
When adding fixtures to your project library you can select from the following libraries:
Selected – lists the fixtures currently available in the project, and allows you to remove unused fixture types.
Generic – this option offers a selection of pre-installed generic fixtures that have a range of Colour options and channel layouts.
Search – if you have previously downloaded a fixture, you can search for it here by manufacturer or by type. From this tab, you can also Search online in our online library. If your local Expert library does not have the fixture you need for your project, you can search for it here. There is a list of options that include manufacturer details and types of fixture available.
It's also possible to create your own custom fixture profiles. See Custom Fixtures for more information.
Adding fixtures to the Canvas
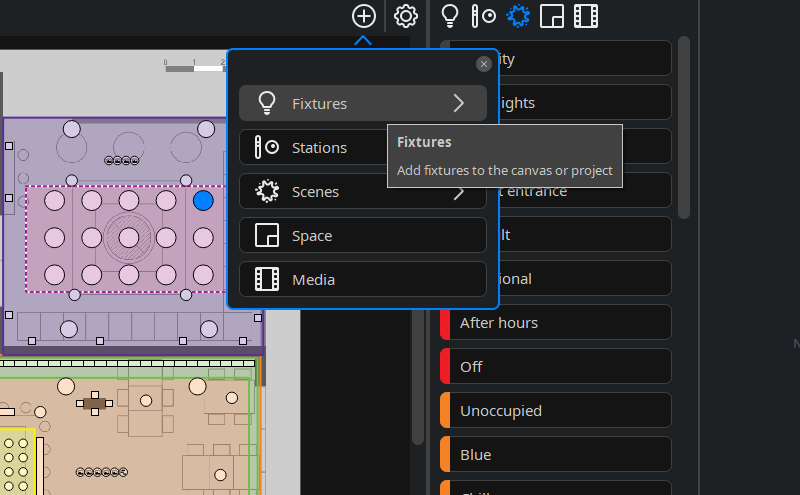
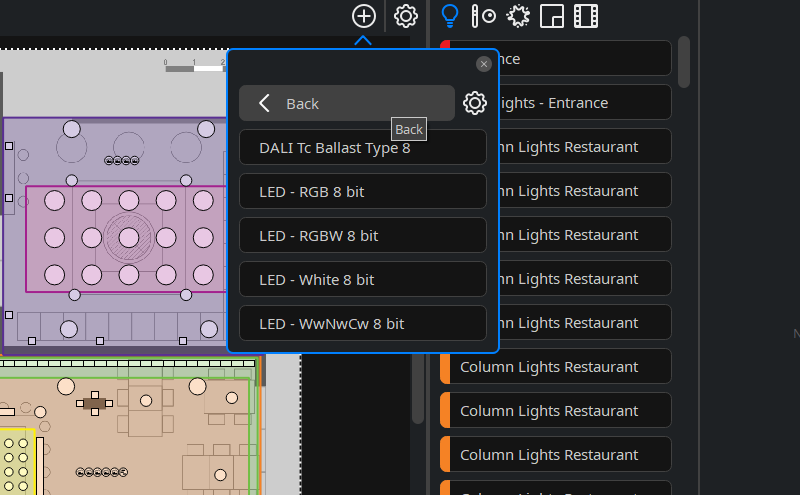
![]() Use the Add items to the project tool in the Canvas window to add new Fixtures that can be chosen from your current fixture selection, or the Configure Fixture Library
Use the Add items to the project tool in the Canvas window to add new Fixtures that can be chosen from your current fixture selection, or the Configure Fixture Library![]() button in the pop-over menu to find another fixture type from the libraries.
button in the pop-over menu to find another fixture type from the libraries.
Fixtures can be placed in Spaces, or Spaces can be drawn later around fixtures. There is always a Project Space which covers the entire Canvas.
Fixtures can be added one at a time or as several fixtures, called an array, by using the Paint fixture array feature. Click and drag the cursor to create an array with the desired number of fixtures. Once created, you can resize the fixture array by dragging the sides or corners, or the radius of the array, or move the array into a different position. You can also rotate the array by using the rotation icon in the middle of the array. In the Properties Editor window you can edit the fixture array while it is still being painted. There is a slider switch to select whether the array is rectangular or circular![]() .
.
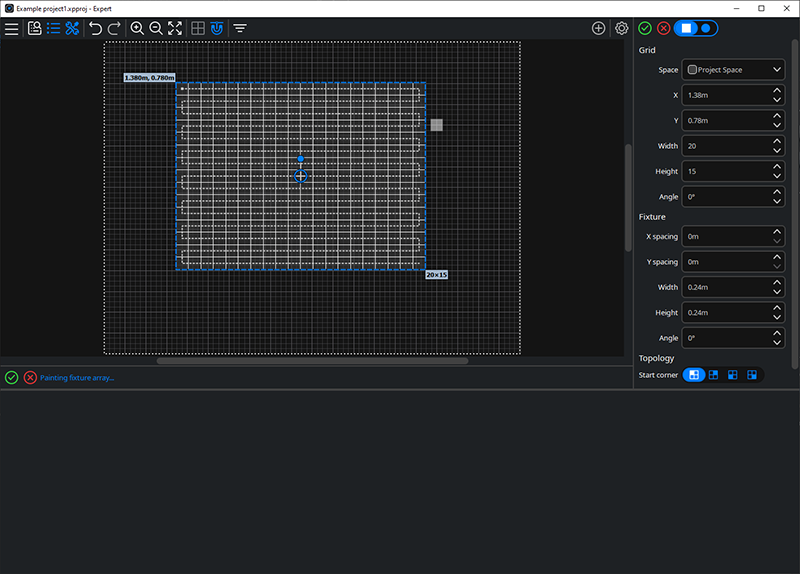
For a rectangular array, the Grid properties available are the X, Y coordinates for the top left corner of the array within the space, the number of columns (Width) and rows (Height) of fixtures, and the Angle of the grid. Fixture properties are the internal fixture X spacing,Y spacing, fixture Width, Height, and Angle. The Topology settings determine how fixture numbers are assigned, by selecting the Start Corner and the Direction of the numeric progression.
For a circular array, the Circle properties available are the X, Y coordinates for the centre within the space, the Fixture Count, Radius of the circle, and the starting Angle of the first fixture. Fixture properties are Width, Height, and Angle. The Topology setting determines how fixture numbers are assigned, by selecting the Direction either clockwise or anti-clockwise from the first fixture placed.
Once you have adjusted the properties to the desired layout you can Commit the array or Cancel![]() . Once you have committed the array you will no longer be able to modify the array as the contents will become individual fixtures.
. Once you have committed the array you will no longer be able to modify the array as the contents will become individual fixtures.
An existing fixture, or selection of fixtures, can be duplicated by dragging the fixture(s) while holding Ctrl (Option on macOS).
Fixture Properties
Once fixtures have been added to a Space, the following options are available in the Property Editor window for each fixture when they are selected on the Canvas or in the Browser:
Fixture – displays fixture type and an editable name field. Fixture number is a unique number automatically applied as fixtures are placed on the Canvas for identification, which can be edited to any unused number. The effect order references a list of all the fixtures in the same space, used for some dynamic Scene effects. The effect order can be changed here, but there are useful tools in the space properties to manage fixture order more effectively.
In the Properties section you can edit:
RDM – lists any RDM UIDs that have been associated with the fixture. These are added either after RDM discovery is carried out or manually by using the 'Edit...' button to open the RDM UID helper. It's also possible to remove associated RDM UIDs using the RDM UID helper.
Placement – has details of the Space the fixture is associated with, and the X, Y coordinates of where the fixture is located in the space.
Appearance – allows you to adjust the size, shape and rotation of the fixture.
Dimming – has default output adjustments for Minimum intensity and Maximum intensity, and Dimmer curve options.
![]() Delete the selected Fixture.
Delete the selected Fixture.
| NOTE: | Due to limitations in the DALI protocol DALI fixtures will only be included in Static Scenes. |
Editing Fixtures
Hovering your mouse on a fixture will display its number and name.
There are further options in the right click context menu.
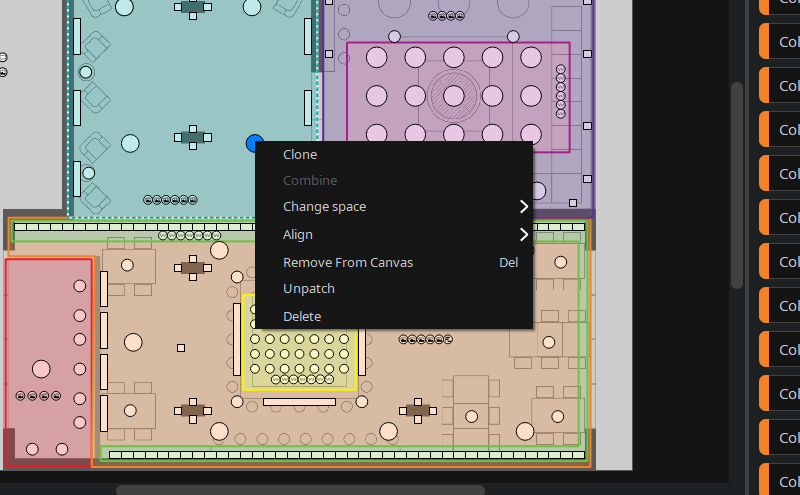
Clone – make one or more clones of a fixture to represent a single addressable circuit with multiple light sources so that on your plan you can represent all the fixtures, whilst only patching and counting for one output channel / set of channels. Also used if outputting identical data to fixtures to more than one location, for example a bridge with both sides mirrored.
Combine – converts two or more individual fixtures into clones of the fixture with the lowest number.
Change Space – move the fixture to another child or parent space at its location.
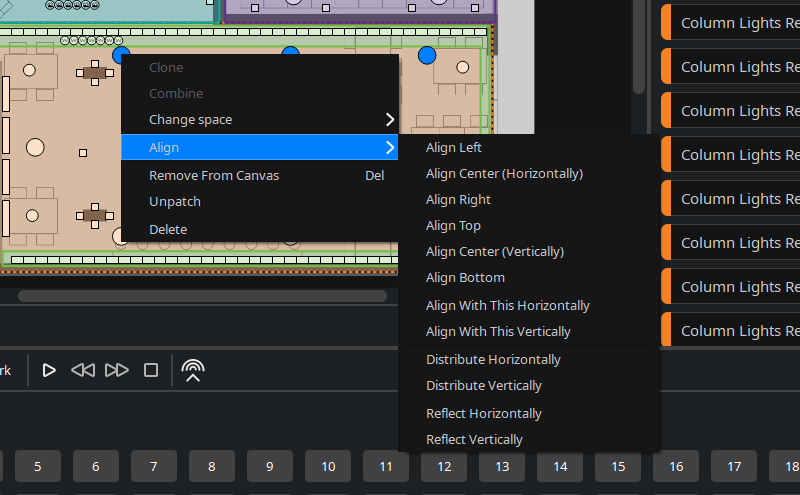
Align - fixtures can be aligned on the canvas by selecting multiple fixtures, right clicking and choosing an alignment option:
-
Align left
-
Align center (horizontally)
-
Align right
-
Align top
-
Align center (horizontally)
-
Align bottom
-
Align with this horizontally
-
Align with this vertically
-
Distribute horizontally
-
Distribute vertically
-
Reflect horizontally
-
Reflect vertically
Remove from Canvas – without unpatching the fixture, it still exists in the project.
Unpatch – without removing from Canvas.
Delete – remove entirely.
Replacing fixtures with different fixture types
If you need to replace a fixture, go to Add![]() and select the preferred fixture, then click on the existing fixture you wish to swap out. This will change its label and maintain programming as much as is possible on the new fixture.
and select the preferred fixture, then click on the existing fixture you wish to swap out. This will change its label and maintain programming as much as is possible on the new fixture.
If the existing fixture is patched and the new fixture has the same DMX footprint or smaller, the patch will be retained. If the new fixture has a larger footprint (eg changing from an RGB 3-channel to an RGBA 4-channel or RGB 16-bit 6-channel fixture) the fixture will be unpatched, and you will need to repatch.
Patching Fixtures
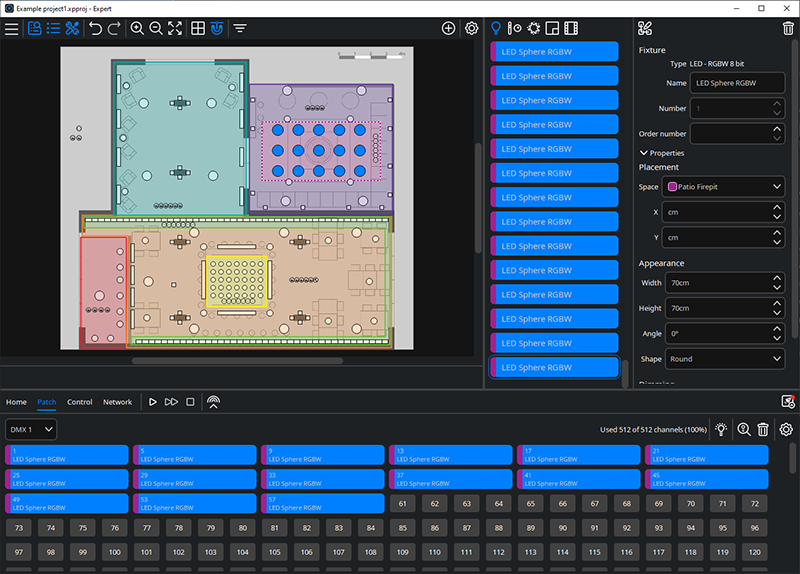
To patch your fixtures, navigate to the Patch tab in the Tools menu and select the appropriate DMX, DALI or eDMX output to view the universe required. Next, select the fixtures to be patched from the Canvas window or Browser and drag them onto the patch window to set their address. One or more fixtures can be added at a time.
You will see that the selected fixtures are highlighted in the Browser window as well as the Tools window under the Patch tab. Fixtures are identified and Colour coded in the Patch tab based on the space in which they are placed. Fixtures can be moved within the patch and if the project is uploaded to an Expert Control, you can use Highlight![]() to turn fixtures on at selected addresses to identify and verify correct patching.
to turn fixtures on at selected addresses to identify and verify correct patching.
For more information see Working with Patch.