User Interface
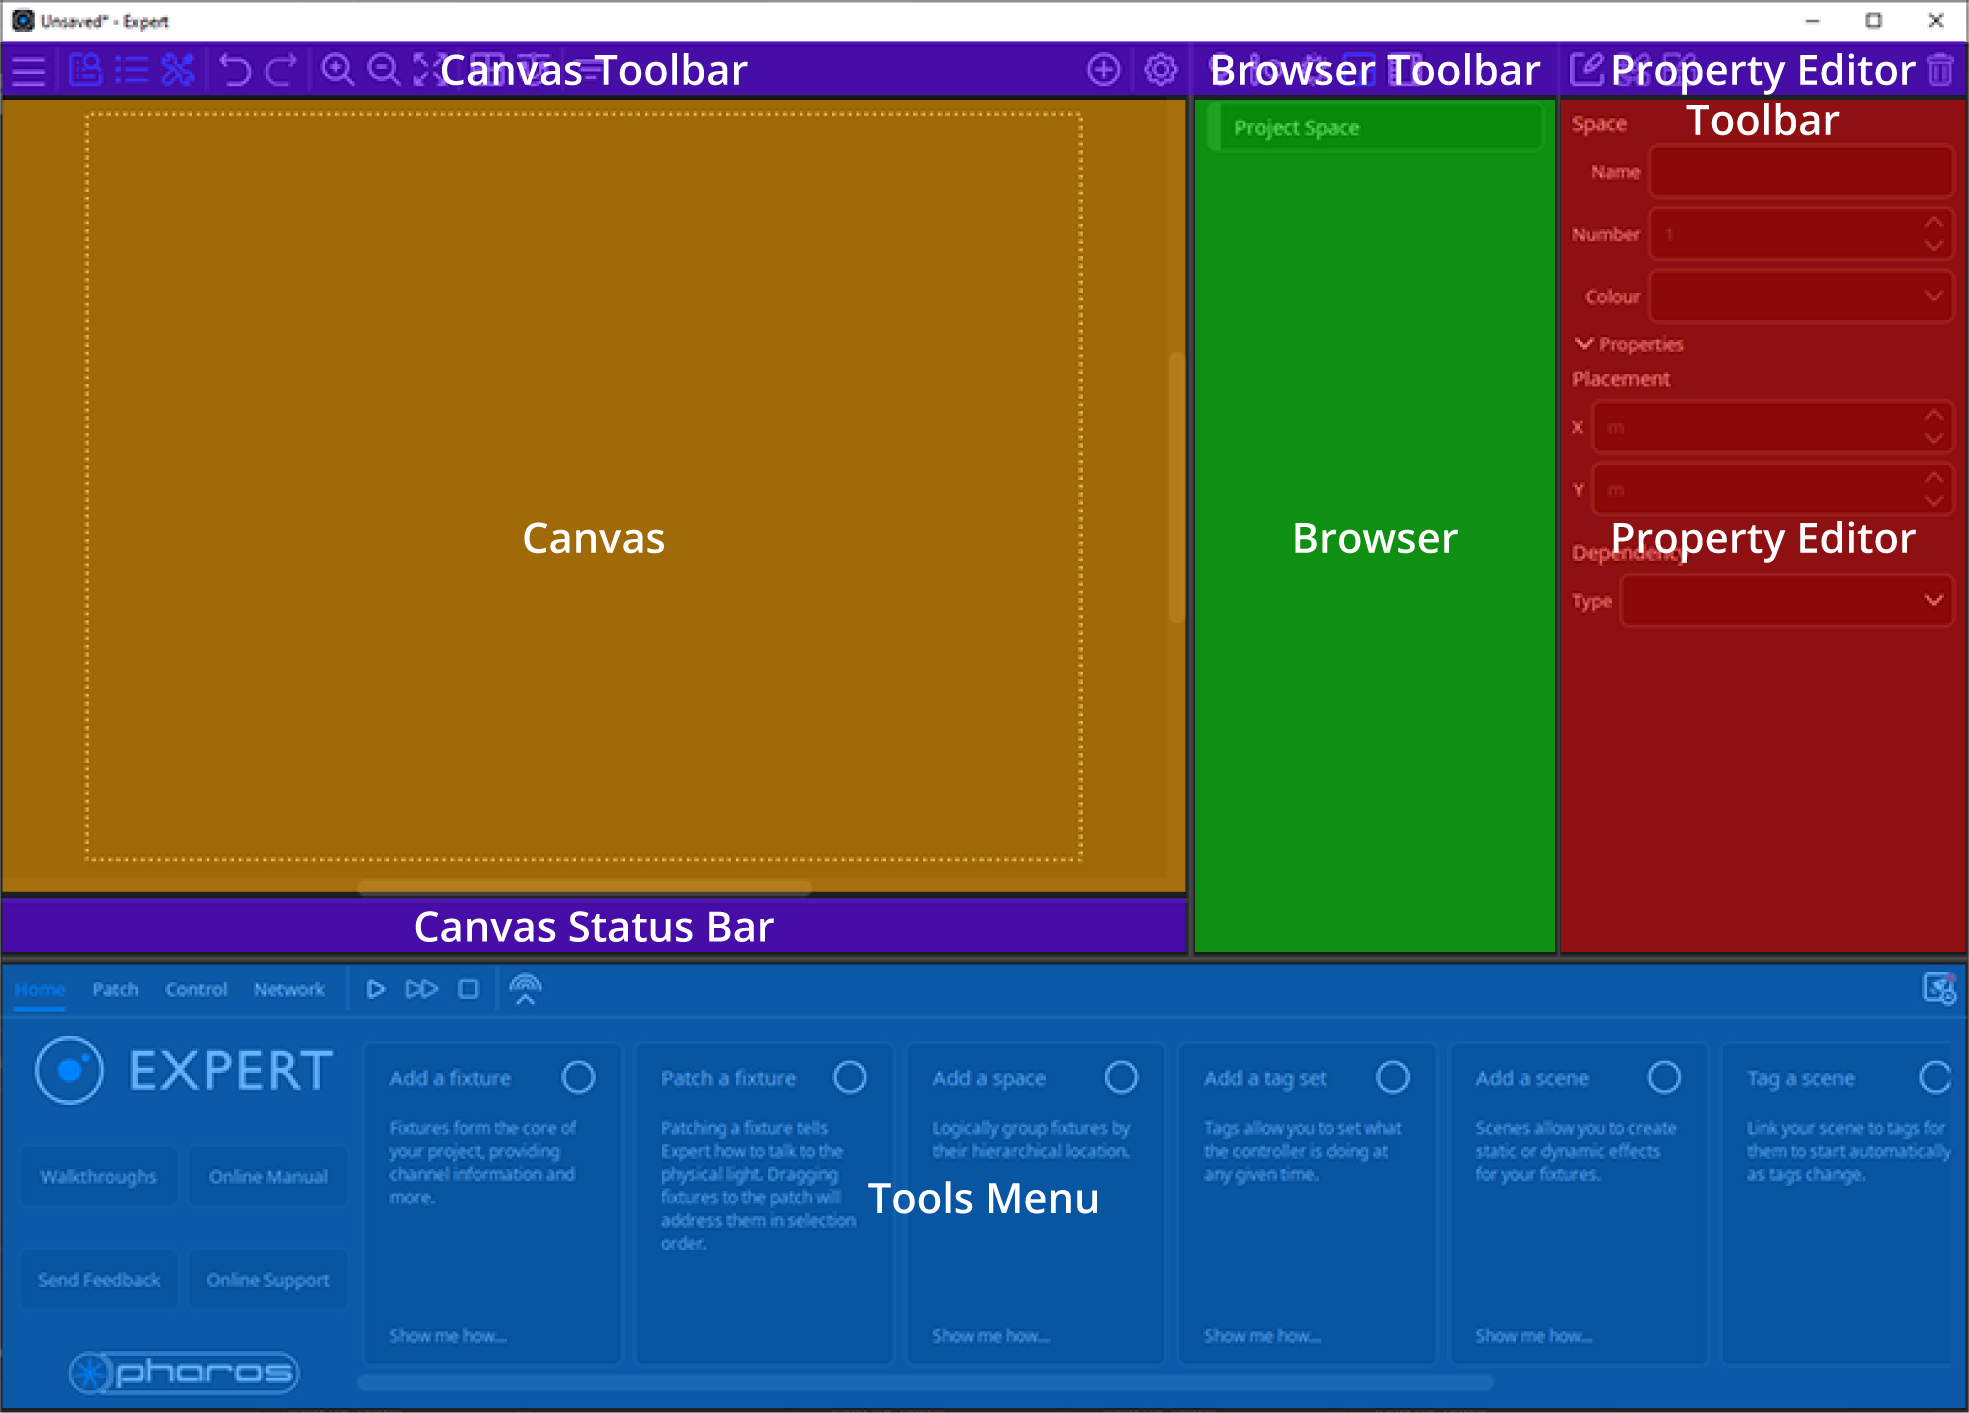
Canvas Toolbar – Contains tools for Canvas navigation and views as well as additional options to show and hide the other sections.
Canvas – The core of a project. Contains all items in the project including; Fixtures, Devices, Scenes, and Spaces.
Colour on the canvas:
Spaces are automatically designated a colour, (which can also be manually selected from a fixed ten-colour palette). The Space colour is used to help identify fixtures and Scenes in that space in other areas of the software.
Items selected on the Canvas, or in the Browser or Patch, are highlighted in blue.
Scenes currently being edited are highlighted in green.
Canvas Status Bar – Dynamically displays information and instructions based on the action currently being executed on the canvas.
Browser – View different item types in your project in a list. Hidden by default.
Browser Toolbar – Switch between viewing Fixtures, Devices, Scenes, Spaces and Media.
Property Editor – Configure the properties of the currently selected item.
Property Editor Toolbar – Tools relating to the currently selected item appear here.
Tools Menu – Items which make a project work.
-
Home – programming suggestions, walkthroughs and online help.
-
Patch – map fixtures on your canvas to physical fixtures.
-
Control – tools to manage how your lighting is activated.
-
Network – the bridge between Expert software and hardware.
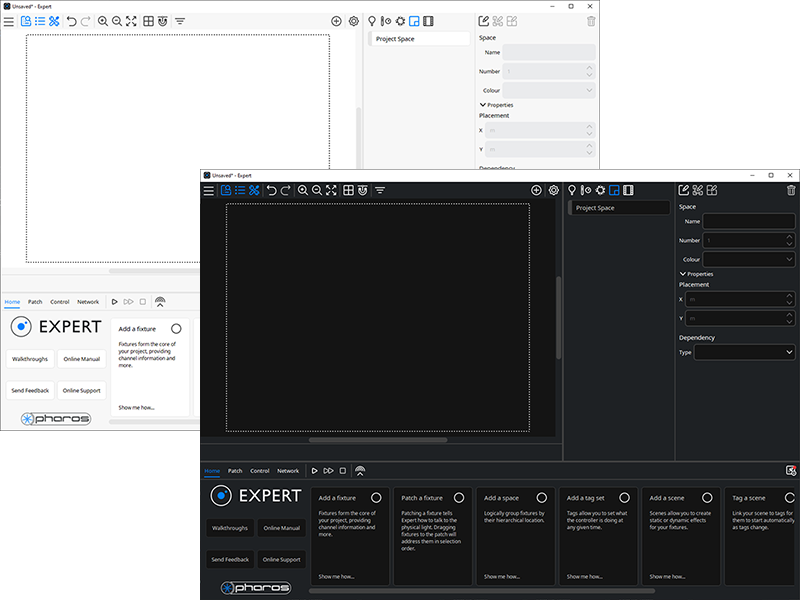
The user interface can be viewed in either a Light Theme or a Dark Theme.
Canvas Toolbar
The canvas toolbar allows you to navigate the canvas and provides access to the Main Menu.
![]()
![]()
Tools from left to right:
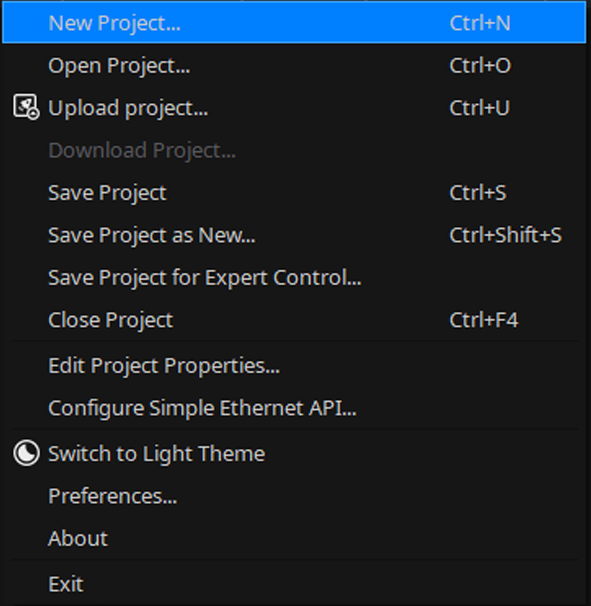
![]() Main Menu – has options to create a New project, Open and Save a project, etc.
Main Menu – has options to create a New project, Open and Save a project, etc.
|
|
![]() Browser – toggles visibility of the browser.
Browser – toggles visibility of the browser.
![]() Properties – toggles visibility of the property editor.
Properties – toggles visibility of the property editor.
![]() Tools – toggles visibility of the tools menu.
Tools – toggles visibility of the tools menu.
![]() Undo or Redo – any actions in Expert.
Undo or Redo – any actions in Expert.
![]() Zoom In or Zoom Out – zoom in or out of the canvas area.
Zoom In or Zoom Out – zoom in or out of the canvas area.
![]() Zoom To Fit – fit the canvas to available space on your display.
Zoom To Fit – fit the canvas to available space on your display.
![]() Show Grid – enables or disables the grid in the canvas area.
Show Grid – enables or disables the grid in the canvas area.
![]() Snap To Grid – enables or disables snapping to grid in the canvas area.
Snap To Grid – enables or disables snapping to grid in the canvas area.
![]() Filter – options to toggle visibility of Fixtures, Devices, Scenes, Spaces or Background Images from the canvas.
Filter – options to toggle visibility of Fixtures, Devices, Scenes, Spaces or Background Images from the canvas.
![]() Add items to the project – options to add Fixtures, Devices, Scenes, Spaces or Media.
Add items to the project – options to add Fixtures, Devices, Scenes, Spaces or Media.
![]() Configure Canvas – access the configure canvas window.
Configure Canvas – access the configure canvas window.
Browser
The browser allows you to manage your fixtures, devices, Scenes, spaces and media in your project. The browser lists all the objects of the same type selected on your Canvas. Each item type has its own tab in the browser toolbar:
![]() Fixtures – view and manage fixtures in the project. Use the Fixture browser to select one or more fixtures (ctrl click, ctrl+shift click etc.) to edit properties, drag to patch or just to identify their colour-coded Space and to highlight on the Canvas.
Fixtures – view and manage fixtures in the project. Use the Fixture browser to select one or more fixtures (ctrl click, ctrl+shift click etc.) to edit properties, drag to patch or just to identify their colour-coded Space and to highlight on the Canvas.
![]() Devices – view and manage devices in the project. Use the devices browser to select one or more device (ctrl click, ctrl+shift click etc.) to edit properties, to identify their colour-coded Space, and to highlight on the Canvas.
Devices – view and manage devices in the project. Use the devices browser to select one or more device (ctrl click, ctrl+shift click etc.) to edit properties, to identify their colour-coded Space, and to highlight on the Canvas.
![]() Scenes – view and manage the Scenes in the project. Use the Scenes browser to select one or more Scene (ctrl click, ctrl+shift click etc.) to edit properties, to identify their colour-coded Space, to highlight on the Canvas, and to simulate the Scene (double-click to start).
Scenes – view and manage the Scenes in the project. Use the Scenes browser to select one or more Scene (ctrl click, ctrl+shift click etc.) to edit properties, to identify their colour-coded Space, to highlight on the Canvas, and to simulate the Scene (double-click to start).
![]() Spaces – view and manage the spaces in the project. Use the Spaces browser to select one or more space (ctrl click, ctrl+shift click etc.) to edit properties, to identify their colour-coded Space, to highlight on the Canvas and to zoom in on the space (double-click).
Spaces – view and manage the spaces in the project. Use the Spaces browser to select one or more space (ctrl click, ctrl+shift click etc.) to edit properties, to identify their colour-coded Space, to highlight on the Canvas and to zoom in on the space (double-click).
![]() Media – view and manage media in the project. View metadata, rename and delete media files.
Media – view and manage media in the project. View metadata, rename and delete media files.
Property Editor
The property editor allows you to adjust properties and settings of the currently selected item.
Upon selecting an item, the property editor will show some basic properties for each item type, such as Name and Number. Further properties can be adjusted on the selected item by choosing to expand the Properties section.
The property editor allows for adjusting properties of multiple items at once, simply select more than one item to adjust them.
Depending on which item type is selected different buttons are shown in the property editor toolbar. More information about these controls can be found in the section of this help which discusses a given item.
Tools Menu
The tools menu allows you to patch your fixtures, control your project settings, connect a controller to your project network, simulate your project, and upload your project.
![]()
![]()
Tools from left to right:
Home Tab – access support information via the Help Centre.
-
Walkthroughs – step-by-step instructions that can show you how to use the tools and features in Expert.
-
Online Manual – gives you access to Expert's online Help documentation (launches in a new window of your system's default browser).
-
Online Support – gives you access to Expert's online resources (launches in a new window of your system's default browser).
-
Send Feedback – opens an email in your default email client. The Pharos support team will receive it and respond. Any questions or issues are welcome. It is often useful to include which version of Expert you have installed eg, v1.2.2 and if possible, please do send the .xpproj you are working on – thank you!
-
Quick Start – gives you access to Expert’s online quick start video.
-
Tutorials – gives you access to Expert’s library of online tutorials.
Patch Tab – with support for DMX, eDMX and DALI, the fixtures are assigned to the universe and protocol to match their physical address. For more information see Working with Patch.
Control Tab – manage how and when lighting Scenes are played. Access the helpers for Configure Tags, Tag Scenes, Configure Schedule, Set Location and Configure Interactions. Your tag sets appear in Control and can be activated as part of simulating your project on the canvas and via Live Output to verify how the tags affect playback state.
Network Tab – manage, connect, configure, and set up the Ethernet Network, and Expert hardware for the project. There will only ever be one Expert Control in a project, but there may be one or more devices. Configure user access and security, set the clock, launch the web interface, reload firmware, and upload projects. For more information see Working with Devices.
![]() Simulation Tools – use these tools to see a simulation of your project including real time clock to view a specific date, time and rate.
Simulation Tools – use these tools to see a simulation of your project including real time clock to view a specific date, time and rate.
![]() Live Output – If an Expert Control is online and running a version of the currently loaded project file, Live Output can be used to output programming to fixtures during commissioning. (Note: This will turn off any fixtures not included in the simulation)
Live Output – If an Expert Control is online and running a version of the currently loaded project file, Live Output can be used to output programming to fixtures during commissioning. (Note: This will turn off any fixtures not included in the simulation)
![]() Upload Project – use this tool to upload your project to the connected Expert Control device.
Upload Project – use this tool to upload your project to the connected Expert Control device.